Welcome to OneTalk!
Learn the ropes in five minutes.

Your One Talk Phone Number
Your assigned One Talk Phone number will provide access to both your Mobile Application (Apple & Andriod) and Desktop Application (PC or Mac).
ONE TALK FIRST STEPS
Verizon One Talk for Admins
This document contains the initial steps to get you started with One Talk services and features. Information on all One Talk setup, features, and solution management can be found on our One Talk Support page.
- Adding devices and users
- User Guides for all end-point devices (smartphones, desk phones, tablets, computers)
- Services, features and functions including Auto Receptionist, Hunt Groups, and 50+ more
- Support and troubleshooting
THE VERY FIRST THING TO DO IS ADD YOUR SMARTFIBER PROJECT MANAGER TO YOUR VERIZON ACCOUNT.
- Login to your Verizon (Wireless) My Business Account – b2b.verizonwireless.com
- Select ‘Manage’ on the top Menu Bar
- Select ‘Company>Company Users>Add User
- Add your SmartFiber Project Manager by Email – i.e. ashley@smartfiberoptics.com
Immediately after the One Talk service has been ordered, your business’s account manager (One Talk Administrator) will receive a welcome email from Verizon with instructions on signing into the Verizon My Business Portal and managing your solution from the One Talk Administrator Portal.

Step 1 - One Talk Administrator Portal
Step 1 – One Talk Administrator Portal
If you placed your One Talk order through a Verizon retail store, a Verizon Business Sales Representative, or a Verizon Authorized Partner, you will be able to see your initial lines and devices when you first sign into the One Talk Administrator Portal within Verizon My Business.
Step 1.a – Sign in to your Verizon My Business account. If you have not set up an account, follow the instructions to register. The Verizon My Business portal can be found in the upper right corner of the vzw.OneTalk.com page.
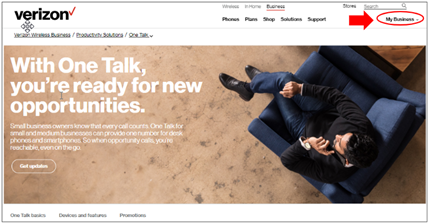
Step 1.b – Go to the One Talk Administrator Portal by selecting Manage Account at the top of the My Business page, and then select One Talk under the Product Tools section.

Step 1.c – You can access all One Talk features and functions, purchase additional services, and access solution and support resources from the Manage Your One Talk Service page.

Step 2 - Company and employee owned lines and devices
Step 2 – Company and employee owned lines and devices
One Talk gives you the flexibility to issue company-owned lines and devices to employees, or allow your employees to use their personal devices with the One Talk Mobile or Desktop App.
With an employee personal phone used for work purposes (bring your own device or BYOD), the One Talk App provides a separate company-owned phone number with benefits, including:
- Your company retains the phone number if an employee leaves the organization.
- The employee does not need to use their personal number with customers or other business-related contacts.
- The employee phone has 2 numbers – their personal number and also the company number used by the One Talk Mobile App.
- The employee’s personal phone number is used as it is normally used – with the default dialer on the device.
Step 3 - Number of lines needed
Make sure that you have enough lines:
- Business numbers
- Individual employee numbers
- Auto Receptionist numbers
- Hunt Group numbers
Step 4 - Adding desk phones and setting 911 address
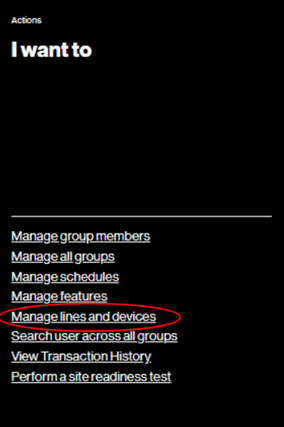
For One Talk users with a mobile device using the One Talk dialer or Mobile App, anytime you are adding a desk phone it is important to first assign the appropriate telephone line by selecting Add New Device from the Manage Lines and Devices page.
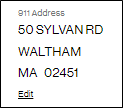
While you are setting up desk phones, you must add the 911 address. This is the physical address where you would want to receive emergency services.
For more information, please refer to our One Talk Support page.s.
Step 5 - Confirm user information for each line
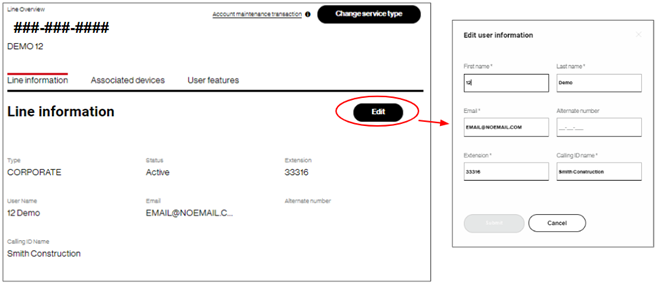
On the Manage Lines and Devices page, select Edit.
- User Name is what will appear in Desk phone displays.
- Email address is critical to ensure proper delivery of an Activation PIN for the Mobile App.
- Extensions are required if you want to use four-digit dialing.
- Calling ID sets the outgoing name or number of the caller.
Step 6 - Order additional lines or equipment
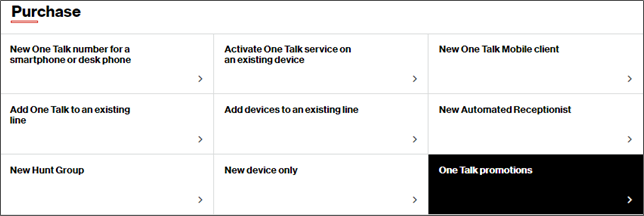
You can easily order additional lines or equipment directly from the primary One Talk Administrator Portal page, in the Purchase section below Overview. Options include:
- Adding a new line for a One Talk dialer on a smartphone, including:
- Ordering a new desk phone
- Adding the One Talk service to an existing Verizon mobile line
- Authorizing employees to use their personal devices with the One Talk Mobile App
Step 7 - New service availability & porting
Using Verizon Wireless numbers
It’s important to understand when your service will be available to use. New telephone numbers can be used as soon as the device assigned to that number is connected. This applies to new smartphones, desk phones, or the One Talk App on mobile devices. Adding One Talk to an existing Verizon Wireless telephone number allows you to start using the service immediately.
Moving other carrier numbers to Verizon Wireless (porting)
When moving an active telephone line from another carrier to use on One Talk, known as “porting a line,” the timeline for availability is different. Lines ported from a wireless carrier are typically available to use within 4 to 24 hours. Lines ported from a wireline carrier can take from 2 to 10 days to move, although most lines port within 2-4 days.
Recommended porting steps:
- Leave your old desk phone plugged in and active until porting is completed.
- Install your new One Talk desk phone and connect for service as soon as it’s received.
Connecting prior to the completion of the porting process will allow you to place calls on the new line immediately, while incoming calls will still go to the old phone.
When the new phone starts to receive incoming calls on that number, you will know porting is complete. You can unplug your old desk phone and contact your previous provider to discontinue your service and billing.
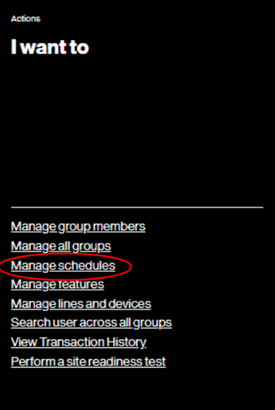
Step 8 - Setting up call routing schedules
Setting up schedules determines incoming call routing during and outside of business hours, ensuring your customer calls always get handled properly. You can use default settings or customize them for your business operation. From the primary One Talk Administrator Portal page, select Manage Schedules.
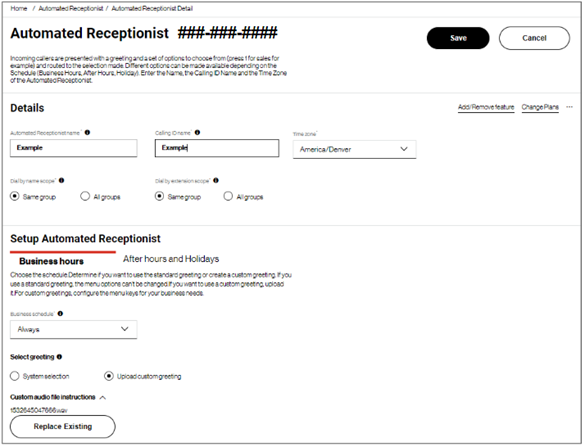
Step 9 - Setting Automated Receptionists
Setting up Automated Receptionists ensures your customer calls always get answered. From the primary One Talk Administrator Portal page, select Automated Receptionist. If you currently do not have an Automated Receptionist number, you can get one by clicking New Automated Receptionist in the Purchase section. For more information, please refer to our One Talk Support page.
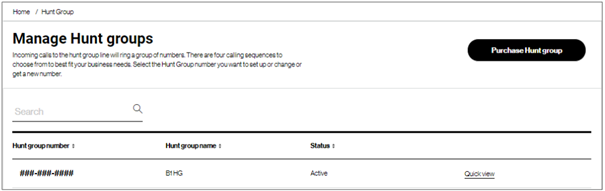
Step 10 - Setting Hunt Groups
Setting up a Hunt Group allows you to direct a customer call to a group of lines. From the primary One Talk Administrator Portal page, select Hunt Group. If you currently do not have a Hunt Group number, you can get one by clicking New Hunt Group in the Purchase section. For more information, please refer to our One Talk Support page.
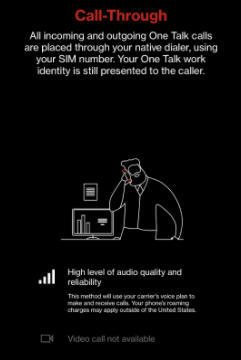
Step 11 - Setting Mobile App Call Through
Users with the One Talk Mobile App will need to 1) download the app, 2) configure the app, 3) choose between App calling and Call Through. Call Through benefits and installation are outlined below.
Call-Through for the One Talk Smartphone Mobile App routes calls over the cellular network voice channel.
- Calls are routed over the cellular voice channel – providing better call quality than standard VoIP communications over congested public Internet
- Multi-carrier support – Verizon phones use VoLTE, One Talk App on other carrier devices use that carrier’s voice channel
- Uses unlimited voice and not data plans for a VoIP calls
- Reduce costs and impact to user data plans (especially employee-owned devices – BYOD)
Installation and Usage
- Once the Mobile App is installed, the user is prompted to select between App calling or Call Through calling. Mobile App Settings in the upper left of the screen provide options for enabling and disabling Call Through (Settings > Call Features > Call Through).
- In-app tutorial provides overview of Call Through.
- When enabling Call Through, the user will be prompted to enter or confirm the SIM number (the smartphone’s phone number).
- For outbound calls, the user dials the number in the One Talk app and is prompted to connect the call using the interim routing number (IRN).
- For inbound calls, a quick call notification icon will pop-up when the screen is not locked, which is the only way to know the incoming call to the native device is a One Talk call aside from the audible instruction to press a key to answer the call when initially answering the call (available on Android only).
- User experience differences between Android and iOS:
- Android will display the IRN number and number being called for outbound calls. iOS will only display the IRN when placing outbound calls.
- While on an active call, Android has a call bubble making it easy to switch to the app for call management options. iOS requires swiping off the dial pad and launching the One Talk app and clicking the active call banner for call management options.
- Native Device Call History – Android displays the called number. iOS displays outbound calls placed to the IRN. Calls are displayed in the One Talk app call history as the number of the person called.
Verizon Technical Support
If you need additional support, please contact the Verizon Customer Care Support Team:
- (800) 922-0204
- Enter one of your One Talk mobile telephone numbers
- Press 1 to select technical support
Visit our One Talk FAQs to review other helpful information.
Add SmartFiber
If SmartFiber is managing your OneTalk Project, the very first thing you want to do is add your SmartFiber Project Champion to your Verizon Account.
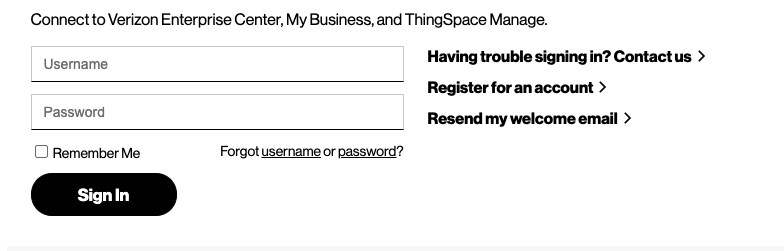
Step 1 - Login to Verizon
- Go to https://b2b.verizonwireless.com
- Enter your credentials in the Sign In field or select Sign In
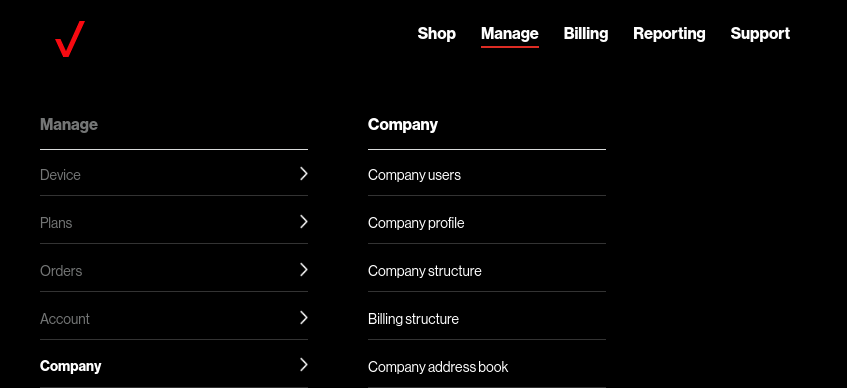
Step 2 - Select 'Manage' from the top menu bar
- Select Manage
- Navigate to Company
- Selectd Company Users

Step 3 - Add New User
- Click Add New User in the Upper Right corner
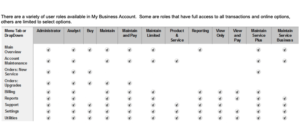
- Add your SmartFiber Order Manager Contact
- Select the role ‘Administrator’ or ‘Maintain Service Plus’
i.e. Ashley Beaird | ashley@smartfiberoptics.com | 757.510.8903

Quick Start
Prepare your Team
Setup your Automated Receptionist
|
Setup hunt ‘ring’ groups
|
Setup voicemail |
Make calls, send texts, and get insights
Communicate From your desk or on the go and learn how to capitalize on OneTalk
Make calls and send texts
|
Transfer, park, and place a caller on hold
|
Moving a call between devices
|

Calls and Texts will be sent to both your Desktop and Mobile Applications. Organizations who use desktop and mobile chat report 67% better overall experience.
Admin your team
Make it easy for users to connect
Setting up new OneTalk Users |
Enable Business Directory
|
Resource & Help Center |

ONE TALK FOR USERS
1. Download One Talk on your DESKTOP AND MOBILE PHONE
- DOWNLOAD IN PLAY STORE OR iOS STORE: send / receive unlimited texts from mobile or desktop computer
- Send messages to both internal and external users
- Place and receive calls from any device using your business line
- Manage voicemails, call routing, and group answering from any device
2. Identify Internal Users & Extensions
- Your 3-5 digit extension will ring to any device – whether you’re in office or on-the-go
- Dial the extension from your mobile device and ring office users (or vice-versa)
- Never miss a call or text and simplify how you communicate
- Calls to your mobile device will have a distinct ringer to help you distinguish personal and work
3. Setup Voicemail
- Your voicemail can be setup from your One Talk mobile application
- In addition to your desktop phone, retrieve and manage voicemail from your desktop and mobile applications
- Setup call forwarding and out-of-office notifications from any device
- Setup Guide
- To create audio files on your mobile phone download the recorder for Android or iPhone
OneTalk User & Admin Guides
Admin Guide
click to download
One Talk for Android Guide
click to download
OneTalk For IoS Guide
click to download
Onetalk for PC Guide
click to download
OneTalk for Mac Guide
click to download
One Talk requires the following protocols and ports so that the devices have service and full functionality:
One Talk Desk Phones
default admin password: @N3ta!k2@2*
Device Configuration
- Protocol: https
- Port: 443
Signaling
- Protocol: SIPTLS
- Port: 5061
Network Time
- Protocol: NTP
- Port: 123
Default DSCP Marking Settings
- RTP DSCP Value: 46
- SIP DSCP Value: 26
Note: NTP can be delivered by the customers DHCP server (option 42). If NTP is not delivered via DHCP, the fallback is to US NIST pool of time servers.
One Talk Mobile & Desktop Clients Registered via Wi-Fi or Ethernet
Device Configuration/Authentication
- Protocol: https
- Port: 444
911 Feature Provisioning
- Protocol: https
- Port: 443
Signaling
- Protocol: SIPTLS
- Port: 443 and 5061
Media (voice/video)
- Protocol: SRTP
- Port: 1024 through 47383
Messaging
- Protocol: IMAP
- Port: 993
Visual Voicemail
- Protocol: TCP
- Port: 143
Additional Ways to Save
SmartFiber provides clients a source of truth and know-how when it comes to connecting, securing, and managing all facets of technology. Funded in part by our Verizon Partnership, SmartFiber provides One Talk clients a free Cloud & Network Assessment. This tailored report delivers your organization recommended solutions and quantifies the financial impact for your business for a wide-range of technology software and services. Compare expense with similar organizations and understand the fair market value for services.

Local Integration
Your VoIP system should be setup to integrate with your existing door entry system, overhead PA communications, and your local network. If you haven’t done so already, contact SmartFiber to discuss the setup of your PA or entry system. We will work to custom integrate your existing entry or PA system into your One Talk VoIP service. This is often times much easier than it sounds and is a function of ‘VoIP’ enabling your existing environment.
")
Get Sales Swag
With so many ways to communicate and collaborate, you’re ready.
Contact your Verizon Wireless business specialist to learn more about how One Talk can help transform your business. For more information about One Talk, click here or visit a Verizon Wireless store near you. And be sure to ask your business specialist about financing your One Talk solution with Verizon Credit.
The above content is provided for information purposes only. All information included herein is subject to change without notice. SmartFiber is not responsible for any direct or indirect damages, arising from or related to use or reliance of the above content.